


Fall, pumpkins, and Snoopy are just a few of my favorite things that all roll into one in Charles Schulz’s classic film. It’s the Great Pumpkin, Charlie Brown. On October 27, 2016, this beautiful story is celebrating its 50th Anniversary, and whether it’s your first time or your 100th time watching, there’s just something about this movie that makes fall special and exciting. My mom recalls when she was a kid sitting on the floor in front of the TV with her brothers and sister as they ate popcorn, watching the long anticipated televised Halloween classic. “If you weren’t home on the night it came on TV, you’d have to wait until next year to see it again,” she reminds me every year. Watching this movie is an annual tradition that I will continue to pass on to my kids and why I want to share this art project with you, in honor of one of the best ways to bring in the fall; It’s the Great Pumpkin, Charlie Brown.
A little background: For three years I was an Art Educator and face painter for an art company in Destin, Florida. We taught art classes to children from 18 months to teenagers and adults as well. When making art with kids, I feel that it’s important to ask questions (relevant to their age), make observations and once the project is completed, have your artist stand up and present their artwork. This can build confidence and helps your little artist have pride in what they have made.


If possible, watch It’s the Great Pumpkin, Charlie Brown, with your child(ren) before doing this project. We are painting the scene where Linus is waiting for the Great Pumpkin–it’s late at night, and they are in the pumpkin patch under the stars. You can talk about the fall night sky and the beautiful colors that they see; it will help them when doing the painting. Having a visual example of what to paint is very helpful, so I would advise a parent to make their own painting step by step along with the little artist to help guide them. Your kids will love seeing that you are doing it too and this way you as a parent feel less inclined to “do” the kids art project yourself. (Guilty)

What you will need:
- Canvas or canvas board (1 per artist)
- Paper plate (2 per artist)
- Paper towels
- Acrylic or water based paint (if you have very young children I advise tempera or Crayola washable paints) in purple, blue, black, white, yellow, orange, green, brown
- Paint brushes, various sizes
- A pencil
- White card stock or construction paper (1 sheet per artist)
- Scissors (1 pair per artist)
- Glue
- Black marker
Cover your table or area that you are having your kids paint on; we use an old drop cloth. Write their name on the back of the canvas or canvas board. Using 1 paper plate, squeeze a small amount of purple, blue and black paint. (You can always add more later)
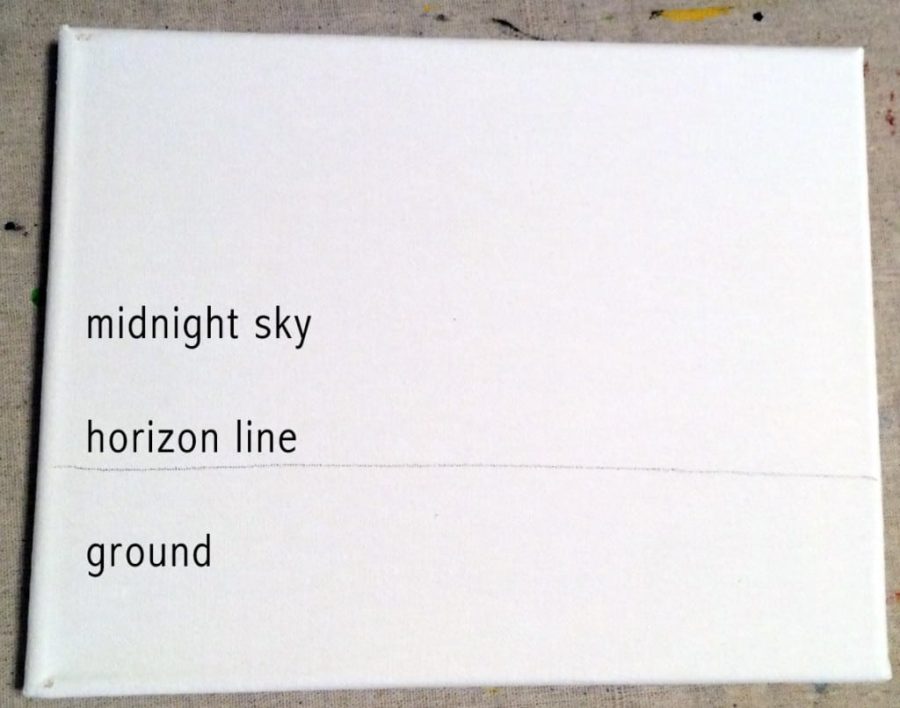
- With a pencil, draw a horizontal line across the canvas towards the bottom third (see photo). This is your horizon line, mention to your artist about the sky and ground and where they meet.
- With a large brush, have your artist paint the ground (under the horizon line) area solid black. You can also have them paint the sides of the canvas if you are using one.
- Next, have your artist paint a midnight sky (above the horizon line) using the purple, blue, and black paint. This does not have any guidelines; just let them go painting a night sky as they see it.
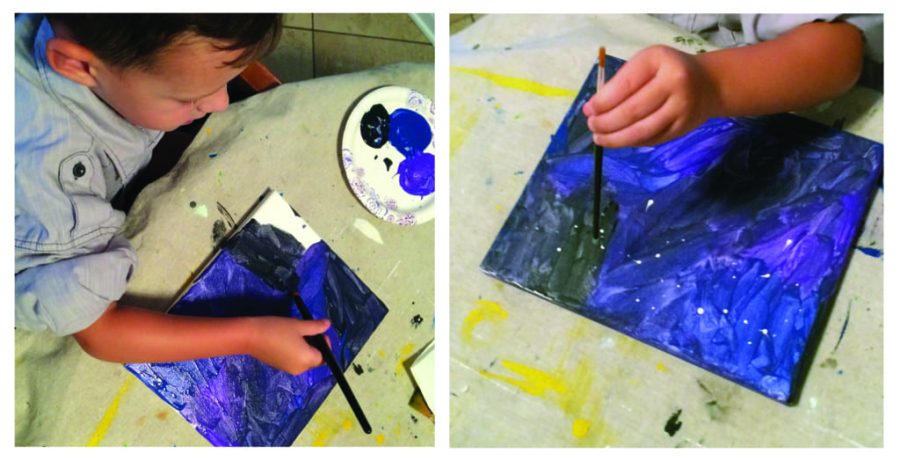
- After the sky and ground are complete, take the white paint and add a very small amount to the paper plate. Using the tip of a small paintbrush, have your artist dab into the paint and make “stars” in just the midnight sky.
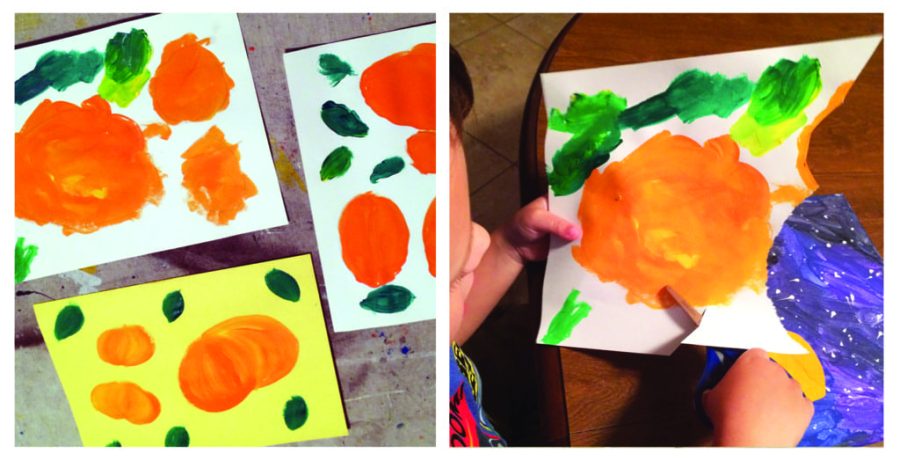
- Set the midnight sky canvas off to the side. While that dries, the next step is to draw and paint the pumpkins, stems, and leaves! You can make plain pumpkins or make Jack -o-lanterns if you wish.
- With a pencil and the cardstock paper or construction paper, your artist will need to draw 3 or more pumpkins, some leaves, and stems. It’s good to make extra leaves, so 6-7 leaves. Smaller artists will need some help making these shapes, but it’s always best to let them try on their own first.
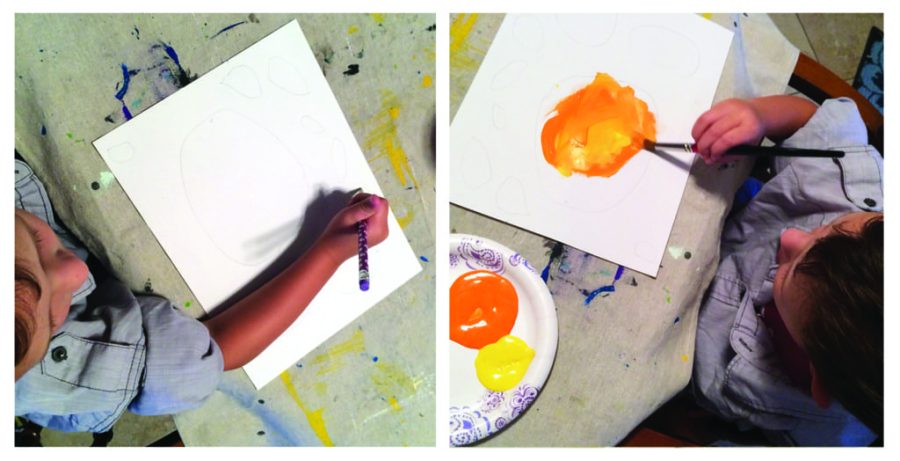
- On the extra paper plate squeeze a small amount of orange, yellow and green paint. Have your artist paint their pumpkins first and then the leaves and stems.
- Set the paper to the side to dry. At this point, you will need to leave the art project to dry for around 20 mins because the pumpkins need to be fully dry to cut out. This is also the time I have my artists wash their hands before they touch ANYTHING!
- Once your pumpkins are dry, cut them out, carefully. Help your artist hold the scissors and cut out the leaves and stems, too. With the younger artists, I tend to hold my hand over theirs and say “chomp, chomp” or “open, close, open, close” to get them use to the cutting motion of the scissors. And don’t be afraid to have a child as young as two try to use scissors, with you, of course, it’s great for their hand eye coordination and self-confidence. If you don’t feel comfortable letting them cut yet, that’s perfectly okay too.
- Take your canvas and lay the pumpkins down where you want them to go, trimming the pumpkins down if you need more room. Once you have them where you want, add the stems and leaves where you want them to go. Laying out the pumpkins first will help ensure room for them all, and this is helping your artist make decisions on what looks good to their eye.
- At this point my kiddos were adamant on making their pumpkins jack-o-lanterns, (even though I was hoping for just plain pumpkins) so I gave them a marker and off they went. My son practiced shapes, and my daughter had to make bows on the girl pumpkins… let them be as creative as they want.
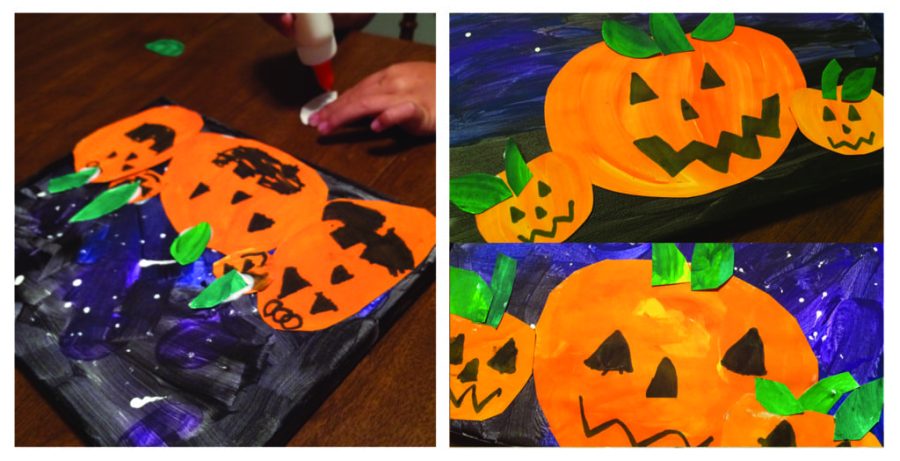
- Starting with the bigger pumpkins, start gluing all the pieces to the canvas. Leaves and stems last and then you’re done!
- Let the art project dry.
Once the art project is completely dry, have your child present it and ask them questions like, what was your favorite part of the project and why?
I hope this painting is something both you and your little artist enjoy! If you have any questions about the project, message me below and I’ll answer you asap! Happy Painting!


